Windows 11 Just Killed Your Printer Again? The One ‘Local Test Page’ Fix That Usually Brings It Back In Minutes
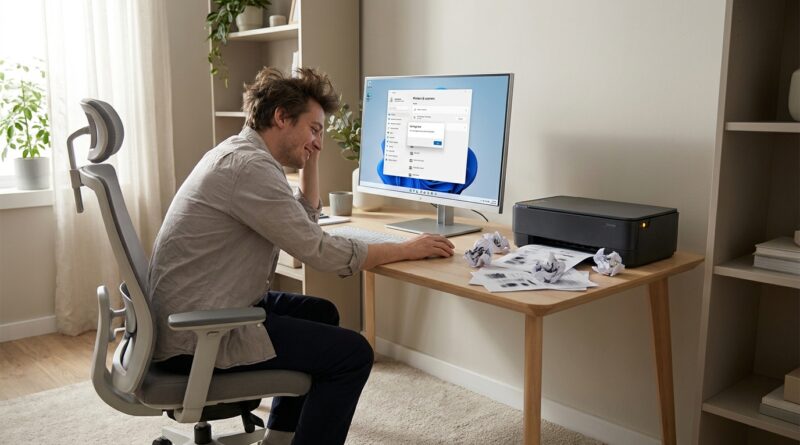
You hit Print, the document disappears, and Windows 11 suddenly acts like your perfectly fine printer has never existed. That is maddening, especially when it worked yesterday. For a lot of home users and small offices, this is happening right after a Windows update. The usual messages are not helpful either. “Printer offline.” “Driver unavailable.” “Not connected.” Sometimes the printer will not even show up when you try to add it again.
The good news is that this is often not a dead printer. It is Windows getting confused by auto-detection, driver swaps, or a broken port setting. The fix that works surprisingly often is simple. Stop relying on Windows to guess. Install the exact manufacturer driver yourself, connect it to a basic local port, then print a local test page. That last step matters because it tells you whether the PC can talk to the printer before you waste time with apps, Wi-Fi, or cloud print settings.
⚡ In a Hurry? Key Takeaways
- The fastest fix for a Windows 11 printer not working after update is usually to reinstall the correct driver manually and attach it to a local port.
- Print a Windows test page before trying Word, email, or PDFs. If the test page works, the printer connection is back.
- This method is safe, repeatable, and especially helpful for HP printers and older models that Windows keeps misidentifying.
Why this keeps happening in Windows 11
Windows 11 loves to “help” by auto-detecting printers and swapping drivers in the background. Most days that is fine. After some updates, it is not.
The PC may reinstall your printer with the wrong driver, assign it to a bad port, or leave behind an old phantom version of the same printer. Then you get a printer that looks installed but refuses to print.
If your PC also started acting strangely after a recent patch, it is worth reading Windows 11 July Update Just Broke Your PC? The One Smart Way To Pause Bad Updates Before They Wreck Your Day. It explains how to stop Windows from piling one bad update on top of another while you fix the problem.
The fix that usually brings the printer back
Here is the plain-English version of the repair:
- Remove the broken printer entry.
- Download the exact driver from HP, Brother, Canon, Epson, or your printer maker.
- Add the printer manually instead of letting Windows search.
- Use a local port, not the mystery auto-detected one.
- Print a local test page.
This sounds a bit old-school. That is exactly why it works.
Step 1: Remove the broken printer entry
What to do
Open Settings > Bluetooth & devices > Printers & scanners.
Click the printer that is failing, then choose Remove.
If you see two or three copies of the same printer, remove all of them. Leave only the printer powered on and physically connected, or connected to your network, depending on how you use it.
Why this helps
Windows often keeps old printer entries around. One may have the right name but the wrong driver. Another may have the right driver but the wrong port. Clearing them out gives you a clean start.
Step 2: Get the exact driver from the manufacturer
Do not trust the generic one if you can avoid it
This is the part most people skip, and it is usually the reason the printer stays broken.
Go to the printer maker’s support page and search for your exact model number. Download the Windows 11 driver, or the latest Windows 10/11 package if that is what the company offers.
This matters a lot for HP printers and older laser printers. Windows may install “HP Class Driver” or a universal driver that looks close enough, but does not fully work after an update.
Quick tip
If your printer has a model name like “HP LaserJet Pro MFP M227fdw,” use that exact model. Not just “HP LaserJet.” The extra letters matter.
Step 3: Add the printer manually
Ignore the auto-detection button for now
Go back to Settings > Bluetooth & devices > Printers & scanners and click Add device.
When Windows starts searching, wait a moment until you see the option for Add manually or The printer that I want isn’t listed. Click that.
This is where many fixes start working, because you are no longer waiting for Windows to guess correctly.
Step 4: Choose a local port
The one setting that often fixes everything
When the wizard asks how to connect the printer, choose the option to add a printer using manual settings or create/select a port.
Then choose Local Port.
Yes, even if the printer is on your network. This confuses people, but stay with me.
If the printer is shared on your network, the local port name can be the printer path, like this:
\\ComputerName\PrinterShareName
If it is a direct USB printer, Windows may create or use a USB virtual printer port during setup. In some cases, selecting the proper USB port also works. But when Windows 11 printer not working after update is the problem, the local port method is often the cleanest way to force a proper binding.
For network printers with an IP address
If your printer is on Wi-Fi or Ethernet and you know its IP address, you can also try a Standard TCP/IP Port. That is often the second-best option.
But if Windows keeps failing to discover it properly, many support techs still fall back to a simpler manual port setup first because it cuts through the auto-detect mess.
Step 5: Point Windows to the driver you downloaded
Do not let it “pick something similar”
When prompted for the driver, choose Have Disk if needed, then browse to the folder where the manufacturer driver was extracted or installed.
Select the exact model from the list.
If Windows offers to use a driver already installed on the PC, I would skip that unless you are certain it is the right one. Old drivers are often part of the problem.
Step 6: Print a local test page
This is the moment that tells you if the repair worked
Once setup finishes, open the printer’s Printer properties and click Print Test Page.
Do this before trying to print your boarding pass, invoice, school form, or tax document.
If the test page prints, the core link between Windows and the printer is fixed. That means any remaining issue is probably inside a specific app, not the printer itself.
If the test page does not print, check the queue. If jobs pile up instantly and show an error, the port or driver is still wrong. Go back and double-check both.
If the printer still says offline
Try these quick checks
Before you give up, run through this short list:
- Make sure the printer is set as the default printer.
- Open the print queue and make sure Use Printer Offline is not checked.
- Restart the Print Spooler service by typing services.msc into Start, then restarting Print Spooler.
- For Wi-Fi printers, print the printer’s network status page and confirm it still has the same IP address.
- Temporarily unplug USB printers and reconnect them to a different USB port.
Why the local test page matters so much
People often skip straight to printing from Word, Chrome, Adobe, or some old bookkeeping app. That adds too many moving parts.
The test page is simpler. It checks whether Windows itself can send a basic print job to the printer. If that fails, you know the issue is still with Windows, the driver, or the port. If it works, you can stop blaming the printer and focus on the app.
Best advice if updates keep breaking things
If this is the second or third time a Windows patch has knocked out your printer, you are not imagining it. It happens more than Microsoft would like to admit.
Once you get things working again, consider pausing updates briefly so your setup stays stable. This guide can help: Windows 11 July Update Just Broke Your PC? The One Smart Way To Pause Bad Updates Before They Wreck Your Day.
Who this fix helps most
This method is especially useful if:
- Your printer worked before a recent Windows 11 update.
- Your HP printer now says Not Connected or Driver unavailable.
- Windows sees the printer sometimes, but not consistently.
- The printer installs, but nothing actually prints.
- You have an older printer that Windows keeps trying to replace with a generic driver.
At a Glance: Comparison
| Feature/Aspect | Details | Verdict |
|---|---|---|
| Windows auto-detection | Quick when it works, but often picks the wrong driver or port after updates | Convenient, but unreliable for broken printers |
| Manual driver from manufacturer | Uses the exact software for your printer model, which avoids generic-driver problems | Best choice for a real fix |
| Local test page | Checks the core Windows-to-printer connection before you test apps or cloud printing | Fastest way to confirm the printer is truly back |
Conclusion
When a Windows 11 update knocks out your printer, it feels personal. But in most cases, the printer is not dead and you do not need to replace it. The reliable fix is usually to stop trusting auto-detection, install the exact driver yourself, connect it to a simple local port, and print a local test page to prove the connection works. That routine is easy to repeat the next time Windows decides to “improve” printing. It saves ink, time, and those painful support calls, especially for HP users and anyone hanging on to an older but still perfectly good printer.