
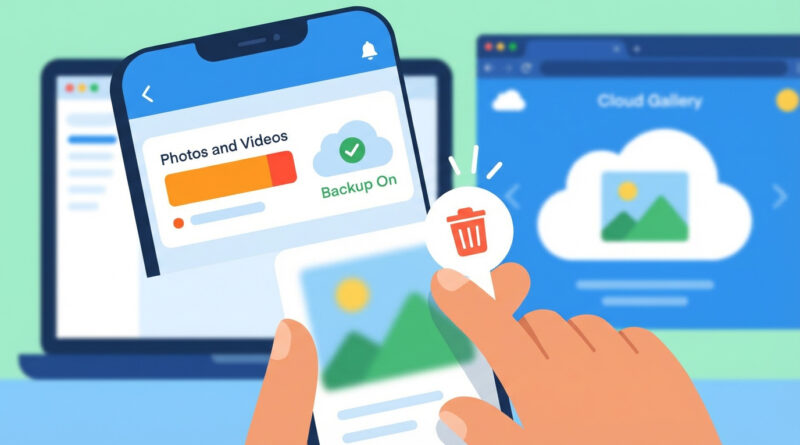
How to Stop iPhone and Android From Filling Up With Photos and Still Keep Everything Safe
Your phone hits 99% storage, you get that “storage almost full” popup, and suddenly every photo feels untouchable. Because what if you delete the one video you will want forever? Totally normal. The fix is not “be brave and delete stuff.” The fix is to prove, with one simple test, that your photos are safely backed up somewhere else first. Once you trust your backup, clearing out blurry shots, duplicates, and giant videos stops feeling like a gamble and starts feeling like taking out the trash. You keep the memories. You get your storage back.
⚡ In a Hurry? Key Takeaways
- Turn on a real cloud photo backup before you delete anything (iCloud Photos, Google Photos, or OneDrive).
- Do a “trust test”: delete one random photo from your phone, then confirm it still shows up on another device or in a browser.
- Once the test passes, you can safely remove local copies, duplicates, screenshots, and big videos without fear.
The One Rule: Don’t Delete Until You Prove Your Backup Works
Most people “kind of” turned on backup at some point. That is not the same as knowing it’s working today, on this phone, with this account, on your current Wi‑Fi.
So we do one tiny experiment. It takes five minutes. And it changes everything.
The “Trust Test” (do this once, then you’ll stop stressing)
- Turn on cloud photo backup (steps below for iPhone and Android).
- Wait for it to finish syncing. Plug in, use Wi‑Fi, and give it time if you have thousands of items.
- Pick one random photo. Not your absolute favorite memory. Just a normal one.
- Delete it from the phone.
- Check from somewhere else:
- On a computer browser, or
- On a tablet, or
- On a friend’s phone you log into for 30 seconds (then log out).
If you can still see it there, you just proved to yourself the backup is real. That’s the anxiety killer.
iPhone: How to Back Up Photos Safely (and Save Space)
Step 1: Turn on iCloud Photos
Go to Settings > [your name] > iCloud > Photos. Turn on Sync this iPhone (or iCloud Photos, depending on iOS version).
Step 2: Turn on “Optimize iPhone Storage”
In that same Photos screen, choose Optimize iPhone Storage. This is the setting that helps the most. Your full-quality originals stay in iCloud, and your phone keeps smaller versions until you need the full file.
Step 3: Do the Trust Test
On a computer, go to iCloud.com and open Photos. If the deleted test photo is still there, you’re good.
Two iPhone gotchas people trip over
- “My iCloud storage is full.” If iCloud is full, it cannot keep backing up new photos. You may need to upgrade storage (even temporarily) or move photos to another service.
- “Deleted on my phone also disappeared from iCloud.” With iCloud Photos, it syncs. That means deletions sync too. If you want a second “safety net,” keep an additional backup somewhere else (more on that below).
Android: How to Back Up Photos Safely (and Save Space)
Step 1: Turn on Google Photos backup
Open Google Photos > tap your profile icon > Photos settings > Backup. Turn it on. Make sure it’s backing up the correct Google account.
Step 2: Wait for backup to complete
In Google Photos, you can usually see backup status at the top or inside the Backup settings. If you’re low on battery or on mobile data restrictions, it may pause.
Step 3: Do the Trust Test
On a computer, go to photos.google.com. If your test photo still shows up there after deleting it from the phone, that’s your proof.
Android gotcha: “Free up space” is powerful
Google Photos has a Free up space option that removes local copies that are already backed up. This can be great. Just do your trust test first so you feel confident.
Once Backup Is Proven, Here’s What’s Actually Safe to Remove
Now you can clean without that “what if?” feeling. Start with the stuff that gives you the most storage back with the least emotional risk.
1) Duplicates and near-duplicates
- iPhone: Photos app > Albums > Duplicates. Merge them.
- Android: Google Photos often groups similar shots. You can also search “screenshots” or sort by size in Files.
2) Screenshots (they add up fast)
Search “Screenshots” in your photo app. Delete old boarding passes, memes you already sent, receipts you no longer need.
3) Giant videos
Videos are the storage bullies. Even a few can wreck your phone. Sort by Largest (some gallery apps allow this), or look at long event videos you don’t need in full.
4) Burst photos and blurry shots
Keep the one good photo. Let the other 14 go. Your future self will thank you.
The “Recently Deleted” Folder Is Not Real Storage Relief (Yet)
When you delete photos, they usually go into Recently Deleted for about 30 days.
- iPhone: Photos > Albums > Recently Deleted
- Android: Google Photos > Library > Trash
If you need storage back today, open that folder and clear it after you’re sure your backup is good.
Want to Feel Even Safer? Use a “Two Places” Rule
If losing photos would crush you, one cloud is good, two places is better. A simple version:
- Primary: iCloud Photos (iPhone) or Google Photos (Android)
- Secondary: A computer hard drive, an external drive, or another cloud (OneDrive, Dropbox, etc.)
You don’t have to do this forever. Even doing it once a month is a big upgrade in peace of mind.
Bonus: Stop the Constant “Storage Almost Full” Stress Alerts
If the popups and pings are making you feel like your phone is nagging you all day, tame the noise while you clean. My favorite trick is setting up one custom Focus so only the important stuff gets through. This guide walks you through it: How to Stop iPhone Notifications From Driving You Crazy (Without Missing the Important Stuff).
At a Glance: Comparison
| Feature/Aspect | Details | Verdict |
|---|---|---|
| Best “set it and forget it” option | iPhone: iCloud Photos + Optimize Storage. Android: Google Photos Backup + Free up space. | Do this first. It prevents the problem from coming right back. |
| Fastest way to regain space | Delete (then empty Trash/Recently Deleted) for big videos, duplicates, screenshots. | High impact, low regret after the Trust Test. |
| Safety check that reduces anxiety | Delete one random photo and confirm it still exists in iCloud.com or photos.google.com. | Best confidence boost. Do it once and cleaning gets easy. |
Conclusion
Holiday trips, kids’ events, and “just one more video” weeks are exactly how phones creep to 99% full. You don’t need to be fearless. You just need proof. Turn on backup, run the one-photo trust test, then clean like you mean it. Once you see your memories are safe somewhere else, you and everyone you know can finally clear the clutter without that stomach-drop feeling.