The Best Way to Move From an Old Windows Laptop to a New One Without Losing Anything
You finally bought the new laptop. It should feel fun. Instead, you are still using the old one because you are worried a “helpful” setup wizard will quietly miss something, like family photos, tax PDFs, or that one work document you need next week. And saved passwords feel like a trap. If you do not know what is being copied, you cannot trust it. My favorite fix is boring on purpose: one folder for everything important, synced to one cloud account, then passwords moved only after you can see your files on the new PC. It is simple, easy to double-check, and you stay in control the whole time.
⚡ In a Hurry? Key Takeaways
- Put everything you care about into one “Move Me” folder on the old laptop, then sync only that folder to OneDrive or Google Drive.
- On the new laptop, sign into the same account and download that folder. Confirm it opens correctly before moving anything else.
- Export and import browser passwords only after your files are verified, so you always have a clear rollback plan.
Why “one folder” beats the confusing transfer wizards
The built-in Windows transfer prompts can feel like a magic trick. Sometimes they copy “most” things, sometimes they skip stuff, and it is not always clear where your files went. The “one folder” method is the opposite. You decide what matters. You can count it, open it, and search it.
Also, when something goes wrong, you only have one moving part to check: that folder and the sync status.
Step 1: On the old laptop, sign into your main cloud account
Pick one cloud service and stick to it for this move
Choose whichever you already use and trust:
- OneDrive is usually easiest if you use a Microsoft account to sign into Windows.
- Google Drive is great if your digital life is mostly Gmail/Google Photos.
Install the official sync app if needed (OneDrive is often already there). Then sign in and confirm you see a cloud icon in the system tray.
Quick sanity check
Open the OneDrive or Google Drive folder on your old laptop and make sure you can create a tiny test file (like “test.txt”) and see it upload. If that works, you are ready.
Step 2: Make a “Move Me” folder and only put important stuff inside it
On your old laptop, create a folder named Move Me in a place you can easily find, like Documents or your Desktop.
Now copy (do not move yet if you feel nervous) the things you cannot afford to lose into that folder:
- Documents (Word, PDFs, spreadsheets)
- Photos and videos you truly care about
- Downloads you still need (installers, receipts)
- Anything on the Desktop you want to keep
Tip: If your photos live all over the place, use Windows search on the old laptop for kind:picture or file types like *.jpg and *.png, then copy the results in batches.
Keep it tidy (this saves you later)
Inside “Move Me,” make a few simple subfolders like:
- Move MePhotos
- Move MeDocuments
- Move MeWork
You are not organizing your whole life. You are just creating a box you can carry.
Step 3: Sync only that “Move Me” folder to the cloud
Drag the “Move Me” folder into your OneDrive folder (or the Google Drive folder). That is it. Now the cloud app will upload it.
How to know it is actually finished
- In OneDrive, the cloud icon should stop showing “Syncing” and show “Up to date.”
- In Google Drive, look for the checkmark or “Sync complete.”
If you have a lot of photos, this part can take hours. Let it run. Plug the laptop in. If your internet is slow, leave it overnight.
If you are worried about iPhone photos too
If part of your “stuff I can’t lose” is iPhone photos, it is worth making sure you have a second copy outside iCloud. This guide walks you through doing it safely without running out of space: How to Stop Your iPhone Photos Filling Up iCloud and Still Keep Your Memories Safe.
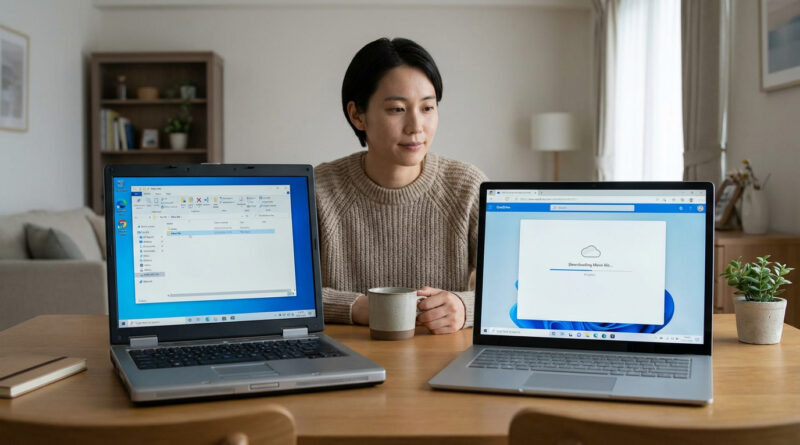
Step 4: Only now turn on the new laptop and sign in
When you power up the new laptop, sign into the same cloud account you used on the old one (same Microsoft account for OneDrive, or same Google account for Google Drive).
Install and sign into the same sync app if it is not already there.
Download just the “Move Me” folder
Open your OneDrive/Google Drive on the new laptop. Find “Move Me.”
- If it already appears, great. Open it.
- If files show as online-only, right-click “Move Me” and choose an option like Always keep on this device (wording varies) to download it.
Verification step (do not skip): Open a few random files. A PDF. A photo. A Word doc. Make sure they open normally.
Step 5: Move browser passwords after your files are confirmed
Passwords are the part that makes people freeze, because they feel invisible. The trick is to treat them as a second, separate job.
Option A (often easiest): Sign into the same browser account
If you use Chrome, sign into Chrome with the same Google account and turn on sync. If you use Edge, sign into Edge with the same Microsoft account and turn on sync. Your passwords often appear automatically.
Option B (most controllable): Export on the old laptop, import on the new one
If you want a clear “I have a copy” step, export passwords from your browser’s password manager on the old laptop, then import on the new laptop.
- Do this only after you verified “Move Me” is safely on the new laptop.
- Save the exported password file inside “Move Me” temporarily, so it gets backed up too.
- After import, delete the exported password file (it is sensitive).
Important: Do this at home, not on public Wi‑Fi. And do not email the exported password file to yourself.
Common “where did my stuff go?” issues (and the quick fixes)
“My Desktop/Documents look different on the new laptop”
That is normal. You are not trying to clone the whole PC. You are carrying your important files in “Move Me.” Once you have that, you can decide what else you want to recreate.
“The cloud says it is syncing forever”
Pause syncing, restart the laptop, then resume. Also check you are not uploading a giant folder you do not need (like an entire Downloads folder full of old installers).
“I do not have enough cloud storage”
Two options:
- Pay for one month of extra storage, do the move, then decide if you want to keep it.
- Move the biggest items (usually videos) via an external drive, and keep the rest in “Move Me” in the cloud.
At a Glance: Comparison
| Feature/Aspect | Details | Verdict |
|---|---|---|
| Clarity and control | You choose exactly what goes into “Move Me,” then verify it opens on the new laptop. | Best for non-techies who want to be sure. |
| Speed | Depends on internet upload and the size of your folder. Can take hours for photos/videos. | Slower than some cable tools, but easier to trust. |
| Password transfer | Done as a separate step. Either browser sync or export/import after files are confirmed. | Safer and less stressful than mixing everything together. |
Conclusion
You do not need a mysterious “transfer everything” button to move to a new Windows laptop. New PCs are bought every day, but data loss and confusion during setup are still incredibly common. The “one folder plus passwords” method keeps you calm because you can see what is happening. Make “Move Me,” sync it, download it, open a few files to confirm, then handle passwords. Simple checklist. No guessing.